Key takeaways
- Using a pressure washer: High pressure can remove paint, roughen resin, force water into seams, and damage drainage components.
- Using household disinfectant without checking the label: Residue can harm plants. Rinse especially well after any disinfecting product.
- Scrubbing too hard: Abrasive pads can permanently dull glossy finishes and expose bare metal.
- Cleaning only the outside: The interior, drainage holes, and underside often contain the most fertilizer residue and pests.
- Reusing contaminated soil: Soil from a planter with severe mold, pests, or root disease should generally be discarded according to local guidance.
- Ignoring material differences: Vinegar is not suitable for every surface, and unfinished wood requires a different care routine from resin.
Outdoor planters collect more than soil. Dust, pollen, bird droppings, algae, hard-water deposits, fertilizer salts, and insect debris can build up on the rim, sides, drainage holes, and inside the pot. If you clean them too aggressively, you can strip paint, scratch resin, crack ceramic, or leave soap residue that harms new plants. Cleaning a planter while it is still full of wet soil can also make it unnecessarily heavy and difficult to handle.
The safest approach is to empty the container, identify its material, remove loose grime, and use the mildest cleaner that works. This guide explains how to clean outdoor planters made from resin, plastic, metal, glazed ceramic, and unfinished materials, with a routine you can repeat throughout 2026.
Our top picks

As an Amazon Associate we earn from qualifying purchases at no extra cost to you.
What You Need
| Item | Why | Optional? |
|---|---|---|
| Nitrile or rubber gloves | Protects hands from dirty water, sharp debris, and cleaning solution | No |
| Plastic sheet, tarp, or drop cloth | Contains spilled soil and dirty water | Yes |
| Soft-bristle brush and old toothbrush | Cleans textured surfaces, rims, feet, and drainage holes without deep scratches | No |
| Two buckets | One holds soapy water; the other holds clean rinse water | Yes |
| Dish soap | Cuts through ordinary dirt, pollen, and light grease | No |
| White vinegar | Helps loosen mineral deposits on compatible, nonporous surfaces | Yes |
| Plastic scraper or old credit card | Lifts stuck-on soil without gouging plastic or resin | Yes |
| Garden hose with a gentle spray setting | Rinses away soap and loosened debris | Yes |
| Clean towels | Dries the exterior and prevents water spots on smooth finishes | Yes |
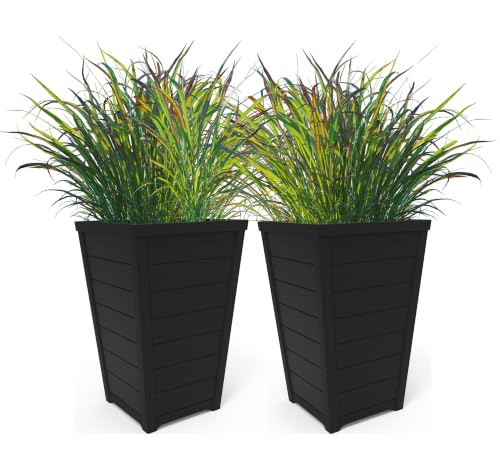
For a replacement or additional container, lightweight resin models can be easier to move and clean than heavy stone or ceramic pots. For example, the YITAHOME two-piece set has 24-inch-tall planters with detachable inner pots and is listed around $44.99. The Keter two-piece set has 22-inch-tall tapered resin pots with a wood-look finish and is listed around $48.40. Prices commonly fall in the $45-$50 range, but check current listings and product-care instructions before using cleaners.
Step-by-Step
-
Move the planter to a safe work area (5 minutes)
Choose a shaded, well-ventilated area near a hose or utility sink. Put down a tarp if you are working on a deck, porch, or patio. Avoid cleaning in full sun, which can dry soap onto the surface and create streaks. Do not clean near storm drains if the water may contain fertilizer, pesticides, or heavy organic waste.
-
Empty the planter completely (10 to 30 minutes)
Remove the plant, root ball, trellis, saucer, inner pot, and loose soil. If the soil is wet, let it drain before lifting a large container. A 22- to 24-inch planter can be awkward even when empty, so get help rather than dragging it across a finished deck or lifting it with one hand.
Shake or brush off remaining soil. If roots are stuck to the drainage openings, loosen them with gloved fingers or snip them with clean pruners. Do not force a metal tool through a blocked hole; it can crack thin plastic or puncture a liner.
-
Remove dry debris first (3 to 5 minutes)
Use a dry soft brush to sweep away dust, leaves, cobwebs, and loose fertilizer granules. Clean the rim, underside, feet, seams, and drainage holes. Removing dry debris before wetting the pot prevents muddy buildup and makes the later washing step faster.
-
Test the surface and cleaner (5 minutes)
Check the care label or manufacturer instructions. For resin, plastic, glazed ceramic, and powder-coated metal, mix about 1 teaspoon of mild dish soap into 1 gallon of warm water. Test the solution on a hidden area for discoloration, dulling, or peeling.
Skip vinegar on unsealed stone, concrete, marble, limestone, and some metal finishes because its acidity can etch or discolor them. Never mix vinegar with bleach or any other cleaner.
-
Wash the exterior (10 to 15 minutes)
Dip a soft brush or microfiber cloth into the soapy water and work from the top down. Use gentle, overlapping strokes on textured resin and wood-look finishes. An old toothbrush is useful around decorative grooves, feet, handles, and the rim.
For stuck-on soil, place a wet cloth over the spot for several minutes, then lift the softened material with a plastic scraper. Avoid steel wool, abrasive powders, and stiff wire brushes. They can leave permanent marks, especially on glossy plastic and painted metal.
-
Clean mineral deposits and algae carefully (5 to 10 minutes)
White crust around the rim or drainage holes is often fertilizer salt or hard-water scale. On compatible nonporous surfaces, apply a solution of equal parts white vinegar and water with a cloth. Let it sit for no more than 5 minutes, scrub gently, and rinse thoroughly. Do not soak metal, porous stone, or unsealed concrete in vinegar.
For green algae or mildew on resin and plastic, start with soapy water and a brush. If discoloration remains, follow the planter manufacturer’s directions for a diluted disinfectant. Never combine bleach with vinegar, ammonia, or other household cleaners.
-
Wash the inside and drainage system (5 to 10 minutes)
Scrub the interior walls, bottom, drainage holes, and any removable insert. Soil residue can harbor pests, fungal spores, and excess fertilizer salts. Hold the planter at an angle while rinsing so dirty water flows out rather than pooling inside.
Make sure every drainage opening is clear. For a narrow hole, use a plastic pick or a soft bottle brush rather than a sharp metal object. If the planter has a detachable inner pot, clean both pieces separately and inspect the contact points for trapped soil.
-
Rinse until no suds remain (3 to 5 minutes)
Use a gentle hose spray or clean water from a bucket. Avoid a high-pressure nozzle, especially on thin resin, painted finishes, caulked seams, or drainage fittings. Continue rinsing until the water runs clear and the surface no longer feels slippery.
-
Dry completely before replanting (several hours)
Turn the planter upside down or place it on its side so air can circulate through the drainage holes. Wipe smooth surfaces with a towel, then let the container air-dry for at least 2 to 4 hours. Porous materials may need overnight drying.
Do not refill a planter while it is still wet inside. Moisture trapped beneath an insert or saucer can encourage odor, algae, and root problems. Once dry, inspect for cracks, sharp edges, loose fittings, and blocked holes before adding fresh potting mix.
Mistakes to Avoid
- Using a pressure washer: High pressure can remove paint, roughen resin, force water into seams, and damage drainage components.
- Using household disinfectant without checking the label: Residue can harm plants. Rinse especially well after any disinfecting product.
- Scrubbing too hard: Abrasive pads can permanently dull glossy finishes and expose bare metal.
- Cleaning only the outside: The interior, drainage holes, and underside often contain the most fertilizer residue and pests.
- Reusing contaminated soil: Soil from a planter with severe mold, pests, or root disease should generally be discarded according to local guidance.
- Ignoring material differences: Vinegar is not suitable for every surface, and unfinished wood requires a different care routine from resin.
How Often
Give outdoor planters a quick exterior rinse every 2 to 4 weeks during the growing season, or whenever bird droppings and visible buildup appear. Perform a full empty-and-scrub cleaning at least once a year, ideally between plantings. Clean sooner after a pest infestation, plant disease, flooding, or a heavy fertilizer spill.
Planters in humid shade may need cleaning every 3 to 6 months because algae grows faster. Containers in full sun with little organic buildup may remain presentable for an entire season, but still check their drainage holes regularly.
When to Call a Pro or Replace
Most planters can be cleaned at home, but replacement is safer when a container has a structural crack, sharp broken edge, unstable base, leaking seam, or drainage design that cannot be cleared. Replace faded or brittle plastic that flexes excessively when lifted. A damaged pot can fail after watering, scattering soil and injuring someone or damaging a surface.
Consider professional help for large concrete, stone, or built-in planters that weigh hundreds of pounds, are attached to a balcony, or cannot be safely emptied. Contact a local plant-care professional if recurring mold, pests, or root disease returns after cleaning and repotting.
FAQ
Can I use bleach to clean outdoor planters?
Only if the planter manufacturer permits it and you follow the product label. A mild dish-soap solution is safer for routine cleaning. If you use a disinfectant, wear gloves, provide ventilation, keep it away from plants, and rinse the planter thoroughly. Never mix bleach with vinegar, ammonia, or other cleaners.
How do I clean white mineral buildup from a plastic planter?
Start with warm soapy water and a soft brush. If the residue remains, test equal parts white vinegar and water on a hidden spot, apply it for up to 5 minutes, scrub gently, and rinse thoroughly. Do not use vinegar on unsealed stone, concrete, marble, limestone, or finishes that the manufacturer says are acid-sensitive.
Can I clean a planter without removing the plant?
Yes, for light exterior dirt. Cover the soil with a towel or plastic sheet, wipe the outside with diluted dish soap, and rinse carefully. For disease, heavy fertilizer deposits, algae inside the pot, or blocked drainage, remove the plant and clean the entire container before repotting it in fresh mix.
Should I seal an outdoor planter after cleaning?
Only use a sealer designed for that specific material. Resin and plastic typically do not need sealing. Unfinished wood, porous concrete, and some stone may benefit from a compatible outdoor sealer, but apply it only to a clean, completely dry surface and keep it away from drainage openings.