Key takeaways
- Staining damp wood: Moisture can prevent absorption and cause cloudy color or premature failure. Wait until the wood meets the product’s moisture requirement.
- Skipping cleaning: Dirt and gray oxidation keep stain from contacting sound wood evenly.
- Using indoor stain or paint: Exterior pergolas need a finish formulated for UV exposure, temperature changes, and rain.
- Applying in direct, hot sun: The surface can dry before the stain levels, leaving stripes and lap marks.
- Overloading the brush or roller: Thick coats may remain tacky and can peel instead of penetrating.
- Ignoring end grain: Cut ends and joints are especially vulnerable to water absorption.
- Using excessive pressure while washing: Gouged cedar cannot be made smooth by additional stain.
- Staining over rot: Finish cannot restore structural strength or stop advanced decay.
Staining a wooden pergola protects the structure from moisture, UV exposure, mildew, and everyday weathering while bringing out the grain. Done poorly, however, stain can peel, turn blotchy, trap moisture, or leave lap marks that are especially visible across wide beams and slatted roofs. Applying stain to damp wood, skipping surface preparation, or working in direct sun can also shorten the finish’s life and make maintenance harder.
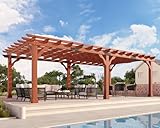
This guide explains how to stain a wooden pergola safely and evenly, whether you are finishing a new cedar kit or refreshing an older backyard structure. The same process works for pergolas such as a 12-by-24-foot cedar model with a trellis roof or a 12-by-16-foot solid cedar kit with a slatted roof. Plan for a full day of preparation and staining, plus drying time before placing furniture or allowing regular use.
As an Amazon Associate we earn from qualifying purchases at no extra cost to you. Product prices and availability are accurate as of the date shown and are subject to change.

What You Need
| Item | Why | Optional? |
|---|---|---|
| Exterior penetrating wood stain | Protects the wood and adds color. Choose a product rated for exterior decks, fences, or siding. | No |
| Wood cleaner or oxygenated-deck cleaner | Removes dirt, pollen, mildew, and surface oxidation before staining. | No |
| Stiff nylon brush and scrub pad | Works cleaner into grain and textured areas without the damage a wire brush can cause. | No |
| Garden hose or low-pressure washer | Rinses away cleaner. If using a pressure washer, keep it at about 500 to 1,200 psi and maintain distance. | No |
| 4-inch brush and 9-inch roller | The brush handles corners, posts, and end grain; the roller speeds coverage on beams and boards. | No |
| Extension pole and small angled brush | Reach roof slats and high framing from the ground or a stable platform. | Yes |
| Drop cloths and painter’s tape | Protects patios, plants, siding, and hardware from drips and overspray. | Yes |
| Moisture meter | Confirms the wood is dry enough to coat. Aim for 15 percent moisture content or lower unless the stain label says otherwise. | Yes |
| Gloves, eye protection, and a dust mask | Protects skin and eyes during cleaning, sanding, and application. | No |
For a medium-size pergola, expect to spend roughly $60 to $180 on stain, cleaner, brushes, rollers, and protective supplies. A new cedar pergola kit can cost approximately $900 to $1,400 before delivery and installation, depending on its size and design.
Step-by-Step
-
Check the forecast and choose a work window (15 minutes)
Pick a dry period with mild temperatures, ideally between 50 and 90 degrees F. Avoid rain, heavy dew, strong wind, and intense afternoon sun. Check the stain label for its specific temperature and recoat requirements. You generally need at least 24 hours without rain after application, and cooler or more humid conditions may require longer.
-
Inspect and repair the pergola (30 to 60 minutes)
Look for loose fasteners, cracked boards, protruding nails, soft spots, and unstable posts. Tighten hardware and replace damaged wood before staining. Check that posts are firmly anchored and that water does not collect around their bases. Do not stain over active leaks, rot, or structural movement; those problems need repair first.
-
Protect nearby surfaces and plants (20 to 30 minutes)
Move patio furniture at least 6 feet away when possible. Cover pavers, concrete, siding, grills, and nearby plants with drop cloths. Tape off metal brackets and surfaces that should not receive stain. Keep stain cans, rags, and tools away from ignition sources, since many oil-based products are flammable.
-
Clean the wood thoroughly (45 to 90 minutes)
Remove cobwebs and loose debris first. Apply an exterior wood cleaner according to its label, then scrub with the grain using a stiff nylon brush. Pay special attention to the undersides of beams, post bases, roof slats, and trellis intersections where dirt collects.
Rinse with a hose or low-pressure washer. If using a pressure washer, use a wide fan tip, keep the nozzle moving, and stay at least 12 inches from the wood. Too much pressure can gouge cedar and raise the grain. Let the pergola dry completely; this commonly takes 24 to 72 hours depending on weather.
-
Sand rough areas and test the stain (30 to 60 minutes)
After cleaning, lightly sand raised fibers, fuzzy patches, and dried cleaner residue with 80- to 120-grit sandpaper. Do not aggressively sand the entire structure unless necessary, because penetrating stain needs an absorbent surface. Remove dust with a clean, dry brush or cloth.
Test the stain on an inconspicuous area or a spare piece of the same wood. Cedar can absorb color unevenly, and the finished shade may be darker than it appears in the can. Let the test patch dry before deciding whether to continue.
-
Stir the stain and plan your sections (10 minutes)
Stir slowly from the bottom rather than shaking the can, which can introduce bubbles. Do not thin the product unless the label specifically permits it. Divide the pergola into manageable sections: one post, one beam, or a few roof slats at a time. Maintain a wet edge so one area does not dry before it meets the next.
-
Stain the highest areas first (2 to 4 hours)
Start with roof slats, trellis pieces, and upper beams, then work downward to posts and lower framing. Use a brush to coat end grain, joints, corners, and fastener areas. Apply stain in the direction of the wood grain using long, even strokes. A roller can cover broad faces quickly, but back-brush immediately to distribute the stain and remove puddles.
Keep each coat thin. Do not allow stain to pool in corners or along the bottom edges of boards. After about 10 to 15 minutes, inspect the section and wipe away excess according to the product directions. Work in shaded areas whenever possible.
-
Apply a second coat only if specified (1 to 3 hours)
Many penetrating stains require one coat, while some water-based products call for a second coat after a stated interval. Follow the label rather than adding extra coats for a darker color. Applying too much product can create a sticky surface, uneven sheen, or peeling film. Pay particular attention to end grain and exposed cuts, which absorb moisture fastest.
-
Allow the pergola to cure and clean up (24 to 72 hours)
Keep furniture, hanging plants, and people away until the stain is dry and no longer tacky. Oil-soaked rags can self-heat and catch fire; spread them flat outdoors to dry in a safe location, or place them in a sealed, water-filled metal container and follow local disposal rules. Remove tape before the stain fully hardens, and wash reusable tools with the cleaner recommended on the label.
Mistakes to Avoid
- Staining damp wood: Moisture can prevent absorption and cause cloudy color or premature failure. Wait until the wood meets the product’s moisture requirement.
- Skipping cleaning: Dirt and gray oxidation keep stain from contacting sound wood evenly.
- Using indoor stain or paint: Exterior pergolas need a finish formulated for UV exposure, temperature changes, and rain.
- Applying in direct, hot sun: The surface can dry before the stain levels, leaving stripes and lap marks.
- Overloading the brush or roller: Thick coats may remain tacky and can peel instead of penetrating.
- Ignoring end grain: Cut ends and joints are especially vulnerable to water absorption.
- Using excessive pressure while washing: Gouged cedar cannot be made smooth by additional stain.
- Staining over rot: Finish cannot restore structural strength or stop advanced decay.
How Often
Inspect the pergola every spring and fall, especially on the sunniest sides and around post bases. Many exterior stains last about two to four years on horizontal or highly exposed surfaces and roughly three to five years on shaded vertical surfaces. Actual life depends on the wood species, climate, roof coverage, stain type, and drainage.
Recoat when water stops beading, the color looks noticeably faded, or the wood begins turning gray. Clean the surface and let it dry before recoating. A maintenance coat usually requires less product than the first application, but peeling or heavily weathered areas may need more preparation.
When to Call a Pro or Replace
Call a professional if posts are sinking, beams are sagging, connections are pulling apart, or more than a small area feels soft when probed with a screwdriver. Hire help for tall structures that require working several feet above the ground, particularly if roof slats cannot be reached safely from a stable platform. Never stand on a pergola’s roof or use an improvised ladder setup.
Replacement may be more practical when rot extends through a post or beam, insect damage is widespread, or repairs would affect multiple structural connections. A pergola kit in the approximately $900-to-$1,400 range may cost less than extensive reconstruction, but compare the price of removal, a new foundation or anchors, delivery, and installation before deciding.
FAQ
Should I stain a new cedar pergola immediately?
Not always. New cedar may need time to dry and acclimate, particularly if it arrived damp or was recently assembled. Follow the stain manufacturer’s moisture guidance, and test a small area first. If water beads strongly on the surface, the wood may need additional drying before it can absorb a penetrating stain.
Can I stain over an existing stain?
Usually, yes, if the old finish is sound, compatible, and not peeling. Clean it thoroughly, remove loose material, and lightly sand rough areas. If the old coating forms a thick film or is badly peeling, stripping or extensive sanding may be necessary.
Is a brush or sprayer better for a pergola?
A brush provides the most control around joints, end grain, and hardware. A sprayer can cover a large structure quickly, but it requires masking, back-brushing, and careful control of overspray. For most homeowners, a roller and brush combination offers a good balance of speed and precision.
What color stain is best for cedar?
That depends on the look and exposure. Clear or lightly tinted finishes preserve more of cedar’s natural appearance but may require more frequent maintenance. Medium and darker pigments generally provide stronger visual color and additional UV protection, but always test the shade because cedar absorbs stain differently from board to board.