Key takeaways
- Turnbuckles: useful for precise tensioning and seasonal removal. Choose appropriately sized marine-grade or exterior-rated hardware rather than decorative indoor fittings.
- Carabiners: convenient for removal, but use load-rated, locking types. Lightweight climbing-look accessories may not be intended for permanent outdoor loads.
- Posts: a 100–150 mm diameter treated timber post, or a properly engineered steel post, is more dependable than a thin fence post. Bury and concrete posts according to local soil and frost conditions.
- Wall fixings: attach only to structural masonry, substantial timber framing, or engineered brackets. Do not rely on cladding, render, hollow soffits, or a thin fascia board.
- Spring components: can soften sudden load changes, but they should not compensate for weak anchors or an undersized structure.
The best shade sails for a patio are usually a high-density HDPE triangle or rectangle sized 30–60 cm smaller than the area between mounting points, with stainless-steel tension hardware and at least 90% UV blockage.
The right choice depends less on the sail’s advertised area than on your patio’s shape, drainage needs, fixing points, and willingness to tension and remove it seasonally. A rectangular sail gives the most usable shade over a dining table, while a triangular sail is easier to fit around trees, walls, and awkward corners. Waterproof fabric can protect furniture from light rain, but it demands a steeper slope and stronger structure than breathable mesh.
Our top picks


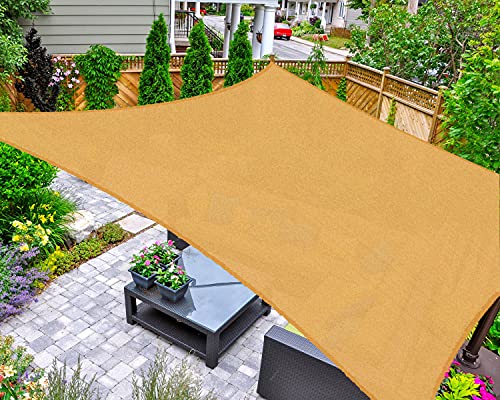
As an Amazon Associate we earn from qualifying purchases at no extra cost to you. Ratings are shown as listed on Amazon.
Best shade sails by patio situation
| Patio situation | Best sail type | Recommended starting size | Why it suits the space | Typical material cost |
|---|---|---|---|---|
| Small seating area or balcony | Triangle, breathable HDPE mesh | 3.0 × 3.0 × 3.0 m | Needs only three anchor points and creates less visual bulk | $45–$120 |
| Four- to six-seat dining patio | Rectangle, breathable HDPE mesh | 3 × 4 m | Provides useful table coverage with manageable tension loads | $90–$220 |
| Large entertaining area | Two overlapping rectangles or multiple triangles | 4 × 5 m per rectangle | Reduces sag and makes damaged sections easier to replace | $200–$550 total |
| Shade plus rain protection | Water-resistant or waterproof polyester/PVC-coated fabric | 3 × 4 m or smaller | Works over a defined zone, provided it has adequate fall for drainage | $140–$400 |
| Temporary, rented, or seasonal home | Lightweight triangle with removable turnbuckles | 2.5–3 m per side | Lower installation cost and easier winter storage | $50–$150 |
Which sail shape fits your patio?
Triangles: easiest to install, least complete coverage
A triangle requires three structural points, so it is the most forgiving option when a patio has one wall, two posts, or a tree that cannot be used for a full rectangle. It also looks lighter and allows several sails to overlap attractively. The trade-off is coverage: a triangular sail leaves more uncovered space near its corners, and a single 3 m triangle will not shade a large dining set as effectively as a 3 × 4 m rectangle.
Choose a triangle when your anchor points are irregularly spaced, when wind exposure is moderate, or when you want to shade a seating corner rather than an entire patio. Rotating the triangle so its corners point toward the strongest available supports can simplify tensioning.
Rectangles and squares: best usable coverage
A rectangular sail is usually the strongest answer for a rectangular patio, outdoor kitchen, or dining area. It covers furniture more efficiently and makes it easier to align the shaded zone with the house. However, four corners create four load paths, so every post, fascia bracket, or masonry fixing must be sound.
For a long narrow patio, a 3 × 5 m rectangle often makes better use of the space than a 4 × 4 m square. Avoid buying a sail that exactly matches the patio dimensions: the fixing hardware, edge curve, and required tension gap all reduce the finished coverage.
How to choose fabric: breathable mesh versus waterproof cloth
High-density polyethylene (HDPE) mesh is the usual choice for hot climates. It blocks sunlight while allowing air to pass through, reducing the “sail” effect in gusty weather. Common shade ratings range from 90% to 95% UV blockage. Mesh generally weighs about 180–340 g per square metre and is easier to handle during installation.
Water-resistant polyester and PVC-coated fabrics are better when keeping a table dry matters more than airflow. They typically weigh about 450–700 g per square metre, place higher loads on their fixings, and need a deliberate slope so rain does not form a heavy pond. A waterproof rectangular sail should generally be installed with at least one corner 30–60 cm lower than the opposite corner across a 3–4 m span, subject to the manufacturer’s instructions.
Waterproofing is not the same as UV durability. Look for UV-stabilised yarn or coating, reinforced corners, double-stitched hems, and a stated shade or UV-blocking percentage. A very cheap fabric may shade well in its first season but become brittle, fade, or tear around the corner rings after prolonged sun exposure.
Sizing the sail correctly
Measure the distance between the proposed anchor points, then subtract a tension allowance. For a 3 m span, allow roughly 10–15 cm at each end for hardware, adjustment, and the sail’s curved edges. As a worked example, if the distance between two posts is 4.2 m, a 3.9–4.0 m sail edge is more practical than a 4.2 m edge. A sail that is too large cannot be tensioned properly; one that is too small may leave an irritating strip of unshaded patio.
Remember that the advertised dimensions may describe the fabric before tensioning, not the straight-line distance between rings. Measure the corners of the sail and compare them with the supplier’s dimension diagram rather than relying on the label alone.
To estimate coverage, multiply the nominal length by width, then allow for the curved edges and changing shade during the day. A 3 × 4 m rectangle has a nominal area of 12 square metres, but the effectively shaded ground area may be closer to 9–11 square metres depending on edge curvature, installation height, and the sun’s angle.
Mounting hardware: where budget choices matter
The sail itself is only part of the system. Each corner usually needs a stainless-steel D-ring or eye plate, a short length of UV-resistant rope or webbing, and an adjustable turnbuckle or tensioner. Stainless steel is preferable outdoors because plated mild steel can rust first at threads and welds.
- Turnbuckles: useful for precise tensioning and seasonal removal. Choose appropriately sized marine-grade or exterior-rated hardware rather than decorative indoor fittings.
- Carabiners: convenient for removal, but use load-rated, locking types. Lightweight climbing-look accessories may not be intended for permanent outdoor loads.
- Posts: a 100–150 mm diameter treated timber post, or a properly engineered steel post, is more dependable than a thin fence post. Bury and concrete posts according to local soil and frost conditions.
- Wall fixings: attach only to structural masonry, substantial timber framing, or engineered brackets. Do not rely on cladding, render, hollow soffits, or a thin fascia board.
- Spring components: can soften sudden load changes, but they should not compensate for weak anchors or an undersized structure.
Hardware kits often cost about $35–$150, while new posts, concrete, and structural brackets can add $150–$700 or more. This is why a seemingly inexpensive sail can become a substantial installation project.
Installation difficulty and the best layout for drainage
A breathable triangle is a manageable DIY project for someone comfortable drilling masonry and setting posts. A large waterproof rectangle is more demanding because it needs accurate heights, strong anchors, and a drainage fall. For any sail, do not install every corner at the same height. A “hypar” layout, with alternating high and low corners, keeps the fabric taut and reduces flapping. A waterproof sail should have a clear low point or slope that directs water away from furniture and walkways.
- Mark the intended shaded footprint and check door swings, gutters, trees, and property boundaries.
- Locate structural anchor points and inspect them for movement, cracking, rot, or corrosion.
- Measure corner-to-corner distances and select a sail with the required tension allowance.
- Set heights so the fabric drains and remains clear of heads, lights, grills, and climbing routes.
- Install hardware, attach the sail loosely, and tension each corner gradually in rotation.
- Stop when the fabric is smooth and firm; excessive tension can distort seams and damage anchors.
Plan on one to three hours for a small sail with existing structural points, and a full day or more when digging and concreting posts. Larger waterproof systems may justify a qualified installer or a structural review, particularly in exposed coastal, mountainous, or storm-prone locations.
Ownership realities: what wears first
Corner reinforcement and stitching usually experience more stress than the middle of the fabric. Flapping caused by loose tension accelerates wear at the corners, while trapped leaves and dirt can encourage mildew. Turnbuckles and threaded fittings may seize if salt, grit, or rust enters the threads.
Brush off loose debris, then wash most HDPE mesh sails with mild soap and cool or lukewarm water. Avoid bleach, aggressive solvents, pressure-washer jets, and abrasive brushes unless the fabric instructions specifically allow them. Let the sail dry completely before storage. Inspect it at least twice a year and after severe weather for stretched seams, frayed webbing, bent rings, rust, and post movement.
Remove the sail before forecast high winds, heavy snow, or prolonged storms unless the manufacturer explicitly rates the system for those conditions. Seasonal removal is not a nuisance to underestimate: a 3 × 4 m mesh sail can weigh roughly 2–4 kg, while a waterproof version may weigh 6–9 kg. Store it loosely folded in a dry, ventilated place rather than compressed while damp.
Final buying decision
Choose a breathable HDPE triangle if flexible fit and simpler installation are your priorities. Choose a breathable rectangle for the best everyday coverage over a dining or lounging area. Choose waterproof fabric only when rain protection is important enough to justify stronger anchors, steeper drainage, heavier handling, and more careful maintenance. In every case, spend as much attention on the mounting structure and tension hardware as on the fabric: a well-sized mid-range sail securely installed will usually outperform a premium-looking sail attached to weak points.