Key takeaways
- Best overall walk-in: Palram Canopia Snap & Grow 8′ x 12′
- Best compact first greenhouse: Palram Canopia Mythos 6′ x 8′
- Best for sturdier build in a small space: Palram Canopia Hybrid 6′ x 8′ class
- Best for cold-winter use: Palram Canopia Glory Premium
- Best for tight budgets and tiny patios: Palram Canopia EcoGrow
- Best for gardeners wanting a bright, simple lean-style look: Rion Sun Room 2 6′ x 8′ class
- Best long-bed layout for serious vegetable growing: Palram Canopia Snap & Grow 6′ x 12′
The best hobby greenhouses for most backyard growers are the Palram Canopia Snap & Grow 8′ x 12′ for a roomy walk-in, the Palram Canopia Mythos 6′ x 8′ for a compact first greenhouse, and the Palram Canopia Hybrid for gardeners who want a sturdier frame at a small footprint. If you are heating through winter, the Palram Canopia Glory Premium with its thicker twin-wall panels is the one to look at. Everything below is organized by the decisions that actually separate a greenhouse you use every week from one that sits half empty: footprint, panel thickness, ventilation, and what you plan to grow.
A hobby greenhouse is not a commercial structure. You are extending a season by a few weeks at each end, starting seedlings, protecting tomatoes and peppers from cool nights, and perhaps overwintering a few tender plants. That changes what matters. Light transmission, ventilation area and a door you can walk through with a wheelbarrow count for more than headline wind ratings. Cold frames, mini greenhouses and polytunnels also compete with walk-in kits for the same job, so this guide explains where each class makes sense before it ranks specific kits.
Our top picks

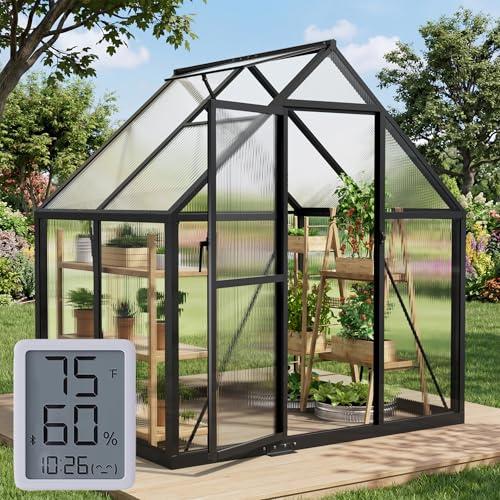


As an Amazon Associate we earn from qualifying purchases at no extra cost to you.
Quick Picks
- Best overall walk-in: Palram Canopia Snap & Grow 8′ x 12′
- Best compact first greenhouse: Palram Canopia Mythos 6′ x 8′
- Best for sturdier build in a small space: Palram Canopia Hybrid 6′ x 8′ class
- Best for cold-winter use: Palram Canopia Glory Premium
- Best for tight budgets and tiny patios: Palram Canopia EcoGrow
- Best for gardeners wanting a bright, simple lean-style look: Rion Sun Room 2 6′ x 8′ class
- Best long-bed layout for serious vegetable growing: Palram Canopia Snap & Grow 6′ x 12′
How We Chose
This ranking is research-based. We compared manufacturer and retailer specification sheets, size charts, warranty terms and published buyer guides, then grouped kits by the criteria that change real outcomes for a home grower. We did not run physical trials, and we make no claim of owning any kit. Where a specification could not be confirmed from a consistent source, the entry below describes the spec class instead of quoting a number.
The criteria were: growing floor area per kit size, headroom, panel material and thickness, frame material, number of roof vents, door width, anchoring and base type, warranty length, and how well the kit scales if you want to add length later. Always confirm current specifications on the manufacturer page before buying, because retailers sometimes list older revisions.
Comparison Table
| Model | Footprint | Growing floor | Headroom | Frame / panels | Best for |
|---|---|---|---|---|---|
| Palram Canopia Snap & Grow 6′ x 8′ | 6 ft x 8 ft | 48 sq ft | About 6.8 ft | Aluminum frame, galvanized steel base, polycarbonate, adjustable roof vent, rain gutters | Starter walk-in |
| Palram Canopia Snap & Grow 6′ x 12′ | 6 ft x 12 ft | Roughly 72 sq ft class | About 6.8 ft | Aluminum frame, polycarbonate, roof vent | Long vegetable beds |
| Palram Canopia Snap & Grow 8′ x 12′ | 8 ft x 12 ft | 96 sq ft | About 6.8 ft | Aluminum frame, polycarbonate, 45.7 in wide door | Serious hobbyists |
| Palram Canopia Mythos 6′ x 8′ | 6 ft x 8 ft | 49 sq ft | About 6.5 ft at center | Rust-resistant aluminum frame, 4 mm twin-wall panels, 5-year limited warranty | Compact first greenhouse |
| Palram Canopia Hybrid | Sizes from 6 ft x 4 ft up to 6 ft x 14 ft | Varies by length | Peak about 82 in | Aluminum frame on galvanized steel base, twin-wall polycarbonate | Sturdy small build |
| Palram Canopia Glory Premium | Premium class | Varies | Varies | 10 mm twin-wall panels, insulated design | Winter growing |
| Palram Canopia EcoGrow | Small footprints | Small | Lower | Resin frame, 4 mm roof panels, 6 mm side panels | Entry-level |
| Rion Sun Room 2 | 6×6, 6×8, 6×10 options | Varies | Not confirmed | Polycarbonate walls, white frame | Bright, easy layout |
Match the Greenhouse Class to the Job
Before you compare brands, decide which class of structure fits your goal. Many first-time buyers pay for a walk-in kit when a smaller option covers what they actually do.
Cold frames
A cold frame is a low box with a hinged transparent lid, usually between 6 and 18 inches tall at the back. It hardens off seedlings, extends salad greens into winter and costs a fraction of a walk-in. Its limit is height: you cannot grow tomatoes upright in it, and you must open the lid manually on sunny days, because internal temperature can spike quickly. Choose a cold frame if you grow leafy crops and have no space for a structure you can stand in.
Mini greenhouses and shelf-style units
Mini greenhouses are tiered shelving covered by a clear cover, often with a zippered door. They suit balconies and small yards for seed starting. Thin covers flex in wind and degrade in sun, so anchor them and expect to replace covers. They are fine for starting seedlings in spring but poor for overwintering anything tender.
Polytunnels
A polytunnel is a hoop frame covered with greenhouse film. It gives the most growing area per unit of cost and is the best fit for in-ground rows. The trade-off is film that needs replacement every few seasons and weaker insulation than twin-wall polycarbonate. Wind and snow loading depend heavily on how well it is anchored and on hoop spacing.
Walk-in polycarbonate kits
These are the kits ranked here. They are the best all-round option when you want to stand inside, run shelving or a potting bench, and keep the structure for a decade or more. They cost more up front and require a flat, level base.
The Best Hobby Greenhouses
1. Palram Canopia Snap & Grow 8′ x 12′
Spec line: 8 ft x 12 ft · 96 sq ft growing area · about 6.8 ft headroom · aluminum frame · polycarbonate panels · 45.7 in wide by 78.7 in tall door · roughly 197 lb
Best for: Growers who want enough room for two side benches and a center aisle, plus a few in-ground or raised-bed crops.
Skip if: Your level site is smaller than about 9 ft by 13 ft once you include working space, or you plan to heat the structure heavily through hard winters.
- Pros: The 96 sq ft floor gives bench space on both sides with an aisle you can turn around in. The wide door admits a wheelbarrow or a potting bench. Aluminum framing resists rust. The Snap & Grow line uses a connector-based assembly system aimed at home builders.
- Cons: The thinner panel class loses heat quickly on cold nights compared with 10 mm designs. The kit weighs about 197 lb, so assembly is a two-person job. A solid anchored base is essential.
2. Palram Canopia Mythos 6′ x 8′
Spec line: 6 ft x 8 ft · 49 sq ft growing area · about 6.5 ft headroom at center · 4 mm twin-wall panels · rust-resistant aluminum frame · galvanized steel base · adjustable roof vent · rain gutters · 5-year limited warranty
Best for: A first greenhouse in a modest yard, mainly for seedlings, tomatoes and peppers.
Skip if: You want to grow tall indeterminate tomatoes in the ground and also keep a bench, since the interior fills quickly.
- Pros: Compact footprint, integrated gutters and a vent in the standard kit, and a lower sidewall design that keeps the structure low-profile. Listed snow load for the 6×8 is about 15.4 lb per sq ft, a figure worth comparing with your local ground snow load.
- Cons: The door opening is narrow, about 22 in wide, so moving large pots takes planning. One roof vent is thin ventilation for hot summers; add a window opener or fan.
3. Palram Canopia Hybrid
Spec line: 6 ft wide, lengths from 4 ft to 14 ft · about 98.4 in long by 72.8 in wide by 82.2 in tall on the compact model · aluminum frame · galvanized steel base · twin-wall polycarbonate · colors include green, silver and gray
Best for: Gardeners who prefer a sturdier frame and want to match the structure to the yard color scheme.
Skip if: You need a published panel thickness before buying; confirm the figure on the manufacturer page for your chosen length.
- Pros: Multiple length options let you scale from a small potting space to a longer growing house. The galvanized base improves rigidity and anchoring.
- Cons: Several retailers list only partial specifications, so compare vent count and panel thickness carefully between lengths.
4. Palram Canopia Glory Premium
Spec line: 10 mm twin-wall polycarbonate · insulated design · listed wind rating about 62 mph · roof load about 20 psf
Best for: Growers in cold climates who plan to keep citrus, herbs or seedlings going through winter with supplemental heat.
Skip if: You grow only from spring to early fall; the extra cost buys insulation you will not use.
- Pros: Thicker panels cut heat loss, which reduces how much heater runtime you need. Higher listed wind and roof ratings than entry kits.
- Cons: Premium tier cost, and thicker panels transmit slightly less light than thin ones, which matters for winter seedlings.
5. Palram Canopia Snap & Grow 6′ x 12′
Spec line: 6 ft x 12 ft · about 6.8 ft headroom · aluminum frame · polycarbonate panels · roof vents · lockable door
Best for: Long, narrow side yards where width is limited but length is available.
Skip if: You want an easy turnaround space inside; 6 ft width is tight with benches on both sides.
- Pros: Good linear bed space for a row of tomatoes or cucumbers along one wall. Extra length allows a potting zone at the far end.
- Cons: Longer structures need more vents for airflow, and long runs make base leveling more demanding.
6. Palram Canopia EcoGrow
Spec line: Resin frame · 4 mm twin-wall roof panels · 6 mm twin-wall side panels
Best for: Seed starting and patio growing on a limited budget.
Skip if: You live where heavy snow or high wind is common, since resin frames are not the strongest option.
- Pros: Lowest cost class here, light to assemble, no rust concerns.
- Cons: Smaller interior, lower headroom, and less structural reserve than aluminum frames.
7. Rion Sun Room 2 (6′ x 8′ class)
Spec line: Offered in 6×6, 6×8 and 6×10 sizes · white finish · polycarbonate wall panels (panel thickness not confirmed in the sources we compared)
Best for: Gardeners who want a bright, clean look and a straightforward floor plan.
Skip if: You want published snow and wind ratings in front of you; check Rion’s specification sheet for your size first.
- Pros: Several size steps, familiar styling, and a layout that works for benches and a small potting counter.
- Cons: Less detailed public specification coverage than the Palram models above.
Worked Example: How Much Greenhouse Do You Need?
Use this step-by-step logic to pick a footprint instead of guessing.
- List what you will grow. Suppose you want 8 tomato plants in 5-gallon pots, 4 pepper plants, and four seedling trays in spring.
- Convert to floor area. A 5-gallon pot occupies about 1.5 sq ft with working clearance. Twelve pots is about 18 sq ft. Four seedling trays on a shelf need about 6 sq ft of bench footprint. That is 24 sq ft of plants.
- Add aisle space. A usable aisle is at least 24 inches wide. In a 6 ft x 8 ft kit (48 sq ft) with benches on one side, you lose roughly 16 sq ft to the aisle.
- Add storage. Reserve 4 to 6 sq ft for tools, watering can and potting mix.
- Apply a growth margin of 30 percent. Most hobbyists add plants in their second year. 24 plus 5 storage gives 29; add 30 percent for roughly 38 sq ft of plant and storage area; add the aisle and you need about 54 sq ft.
That result sits between a 6×8 (48 sq ft) and an 8×12 (96 sq ft). If you can fit it, step up to the larger kit, because adding a bench later is easy but adding floor area is not. If the yard cannot hold a 9 ft by 13 ft level pad, choose the 6×8 and plan to grow vertically with hanging baskets and tiered shelving.
Buying Criteria With Thresholds
Panel thickness
Thin twin-wall panels around 4 mm are common on entry kits. They pass plenty of light and suit three-season use. For winter heating, look for 6 mm to 10 mm. Thicker panels trap more air and cut heat loss, but each step reduces light transmission slightly. For a greenhouse you will not heat, 4 mm is perfectly adequate.
Ventilation
Overheating kills more greenhouse plants than cold does. As a working rule, aim for roof vent opening area of at least 15 to 20 percent of floor area, and add a door you can prop open. A 6×8 kit with a single roof vent usually needs a small circulation fan on hot days. Automatic vent openers that use a wax cylinder need no power and are an inexpensive upgrade.
Frame and base
Aluminum frames resist rust. A galvanized steel base adds rigidity and gives you something to anchor. Place the kit on a level pad of compacted gravel, pavers or a treated lumber frame, and use the anchoring hardware supplied. A lightweight greenhouse that is not anchored can be moved by wind long before it reaches its rating.
Door width
A door around 22 in wide is workable for walking in but awkward for large pots. Doors around 45 in, as on the 8×12, let you bring in a cart. If you plan to move heavy planters, door width should outrank headroom.
Warranty
Five-year limited warranties are common on the Palram lines listed. Read what they cover; panel yellowing and hardware are treated differently.
Shelving, Benches and Heaters
Shelving
Choose rust-resistant shelving, such as powder-coated steel or plastic, because greenhouse humidity corrodes bare steel quickly. Slatted shelves drain water and allow airflow. Keep the heaviest shelves at the lowest level and avoid attaching heavy loads to roof bars unless the manufacturer allows it.
Heaters
If you add a heater, match it to the structure. As a rough class, small thermostat-controlled electric fan heaters suit 6×8 kits for frost protection only. Fuel-burning heaters need ventilation and carbon monoxide awareness; use only heaters rated for greenhouse or enclosed use and follow the manufacturer’s clearance guidance. Electrical equipment must be rated for damp locations and plugged into a ground-fault protected outlet. Keep heaters away from panels, plants and anything flammable, and never leave a fuel heater running unattended.
Shade and airflow
In summer a shade cloth rated around 30 to 50 percent keeps interior temperatures manageable. An oscillating fan reduces fungal problems by moving humid air across leaves.
Common Mistakes
- Buying for today’s plants rather than next year’s.
- Placing the greenhouse in partial shade; most vegetables need six or more hours of direct sun.
- Skipping a level base, which twists frames and makes panels leak.
- Underestimating ventilation needs.
- Ignoring local snow load and wind exposure when comparing ratings.
Frequently Asked Questions
What size hobby greenhouse is best for a beginner?
A 6 ft by 8 ft kit is the usual starting point. It holds a bench and a dozen pots, but many growers outgrow it, so choose 8 ft by 12 ft if space allows.
The smaller kit is easier to place and anchor. The larger one gives you an aisle and benches on both sides, which makes working under cover far more comfortable.
Is polycarbonate better than glass or film for a hobby greenhouse?
For most home growers, twin-wall polycarbonate is the better choice. It resists impact, insulates better than single glass and lasts longer than film.
Glass offers the best clarity but is heavy and breakable. Film is cheapest but needs replacement every few seasons.
Do I need a foundation for a greenhouse kit?
Yes, you need a level, firm base. Gravel, pavers or a lumber frame all work, and the kit must be anchored to it.
Without a flat base, doors and panels misalign and wind can shift the structure. Follow the manufacturer’s anchoring instructions for your soil type.
How do I keep a greenhouse from overheating?
Combine roof vents, an open door, shade cloth and a small fan. Ventilation area of 15 to 20 percent of floor area is a good target.
Automatic wax-cylinder vent openers react to temperature without electricity, which makes them a dependable low-cost upgrade.
Can I use a hobby greenhouse in winter?
Yes, with limits. Unheated kits extend the season by a few weeks, while insulated panels and a heater allow overwintering of tender plants.
Thicker 6 mm to 10 mm panels reduce heat loss. Use only heaters rated for enclosed use and maintain ventilation for safety.
Are cold frames better than greenhouses for small gardens?
Cold frames suit leafy crops and seedling hardening in tight spaces. They cost less but cannot hold tall plants or let you work inside.
Choose a cold frame if your goal is early lettuce and spinach. Choose a walk-in if you want tomatoes, peppers or year-round projects.
How long does it take to assemble a greenhouse kit?
Most home kits take roughly a full day for two people. Plan on four to six hours for the Palram Snap & Grow line, plus base preparation time.
Assemble on a calm day, because large panels catch the wind. Read the full instruction sheet before opening hardware bags.
What should I check before buying a kit?
Check footprint, door width, vent count, panel thickness, frame material, anchoring and warranty. Compare snow and wind ratings with your local conditions.
Confirm the current specification on the manufacturer page, because retailers sometimes list outdated revisions of the same model name.
Final Recommendation
If you have room, the Palram Canopia Snap & Grow 8′ x 12′ offers the most usable space for the money class. If you have a smaller yard, the Mythos 6′ x 8′ is the safer first step. Choose the Glory Premium only if you will actually heat through winter. Whichever kit you pick, spend as much effort on the base, the ventilation plan and the location as on the kit itself, because those decide whether the structure earns its place in your garden.