Key takeaways
- First-time DIY, tight budget, curved beds: plastic coil at 12–13 cm deep. It bends to any radius and costs little enough to redo if the line isn’t perfect.
- Couch, Bermuda or kikuyu in the lawn: steel strip at the full 15 cm, or brick on mortar. Anything less and rhizomes pass underneath within two seasons.
- Formal straight runs you want to install once: powder-coated aluminium or Corten steel. Higher upfront cost, near-zero upkeep.
- Traditional or cottage-style garden edging for flower beds: a brick soldier course laid at 45° gives both a root barrier and a mowing edge.
- Beds surrounded by paths or gravel, not lawn: decorative willow or bamboo is fine — there are no grass roots to block.
Edging for lawns and flower beds only stops grass creeping in if 10–15 cm (4–6 in) of the material sits below the soil — the exact depth depends on whether your lawn spreads by seed or by underground runners. Get that depth wrong and even expensive edging is just decoration; get it right and a £1-per-metre plastic coil will out-perform a poorly installed steel strip.
Clump-forming lawns (fescue, ryegrass) rarely send roots deeper than 10 cm, so 4 in of buried edging blocks them. Creeping grasses like couch, Bermuda and kikuyu push rhizomes 15 cm or deeper, which is why aggressive lawns routinely tunnel under shallow borders. Anything sitting less than 8 cm below grade — woven willow hurdles, picket-style bamboo — is purely decorative and will not stop grass.
Our top picks



As an Amazon Associate we earn from qualifying purchases at no extra cost to you.
Edging materials compared: depth, lifespan and cost
| Material | Depth below soil | Stops creeping roots? | Typical lifespan | Materials cost per metre |
|---|---|---|---|---|
| Flexible plastic coil | 10–13 cm (4–5 in) | Yes, to 13 cm | 5–10 yrs | £1–3 |
| Galvanised or Corten steel strip | 10–15 cm (4–6 in) | Yes | 15–25 yrs | £6–12 |
| Powder-coated aluminium strip | 10–15 cm (4–6 in) | Yes | 20+ yrs | £8–15 |
| Brick soldier course on mortar | 10–12 cm bed plus haunch | Yes, fully | 20+ yrs | £4–8 |
| Poured concrete / mowing strip | 15 cm footing | Yes, fully | 25+ yrs | £8–14 |
| Timber log roll or sleepers | 10–15 cm | Partially (gaps at joins) | 3–10 yrs | £2–6 |
| Woven willow or bamboo border | 5–8 cm | No | 2–4 yrs | £3–6 |
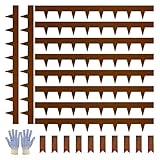
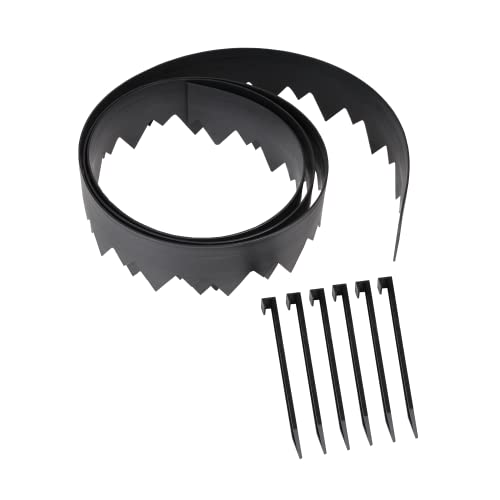
Steel systems such as EverEdge-style spike strips and aluminium systems like Sure-loc-style edging dominate the mid-to-premium range because their thin profile disappears visually while the full depth works below ground. Plastic coil edging (the EasyFlex type sold in 6–20 m rolls) is the budget benchmark — perfectly functional if buried deep enough and staked properly.
Match the material to your situation
- First-time DIY, tight budget, curved beds: plastic coil at 12–13 cm deep. It bends to any radius and costs little enough to redo if the line isn’t perfect.
- Couch, Bermuda or kikuyu in the lawn: steel strip at the full 15 cm, or brick on mortar. Anything less and rhizomes pass underneath within two seasons.
- Formal straight runs you want to install once: powder-coated aluminium or Corten steel. Higher upfront cost, near-zero upkeep.
- Traditional or cottage-style garden edging for flower beds: a brick soldier course laid at 45° gives both a root barrier and a mowing edge.
- Beds surrounded by paths or gravel, not lawn: decorative willow or bamboo is fine — there are no grass roots to block.
Installing strip edging: trenching and staking step by step
Step 1: Mark the line
Lay a garden hose or rope along the intended edge and adjust until curves look right from the house. For straight runs, string between two pegs. Mark the line with sand, spray paint or a scored cut from a spade.
Step 2: Dig the trench
Cut vertically along the line with a half-moon edger or sharp spade, then dig a trench one spade-width (about 10 cm) wide and 13–15 cm deep. Keep the lawn-side wall vertical — the edging needs a flat face to press against or it will lean over time.
Step 3: Set the edging at the right height
Place the strip so the top sits 1–2 cm above the finished bed soil level. That’s high enough to hold back mulch but below mower blade height, so you can run one wheel of the mower on the lawn edge without scalping or chewing the edging.
Step 4: Stake it
Drive stakes on the bed side (they stay hidden) at 90–120 cm intervals on straight runs, tightening to 45–60 cm on curves and in frost-prone ground where winter heave works fixings loose. Worked example: a 12 m border at 1 m spacing needs roughly 13 stakes — one per metre plus one at each end. Steel edging with integral spikes simply pushes or taps in; use a block of scrap wood over the top edge so the hammer doesn’t deform it.
Step 5: Backfill and compact
Backfill in 5 cm layers, firming each layer with your foot or the back of a rake. Water the line to settle the soil, then top up any hollows. A poorly compacted trench sinks below soil level within weeks and creates a gap mulch escapes through.
Brick and stone edging: the mortar difference
Dry-laid bricks heave in frost and leave gaps roots exploit. For a lasting soldier course, dig a 10–12 cm trench, lay bricks at roughly 45° on a 2–3 cm bed of 4:1 sand-to-cement mortar, then haunch mortar up both sides of the buried portion. Leave it to cure for 24–48 hours before backfilling or mowing near it. The mortared haunch is what makes brick a complete barrier rather than a row of peep-holes.
Creating a flower bed from lawn
Two workable routes, depending on patience:
- Same-day strip: mark the shape, skim off turf 3–5 cm below the surface with a spade or hired turf cutter. Stack the turves grass-side-down somewhere shady — they compost into useful loam within a year.
- No-dig smother: scalp the grass short, lay plain cardboard overlapped 10–15 cm at the seams, soak it, then cover with 10–15 cm of compost and mulch. Grass dies underneath; you can plant through the cardboard straight away for most perennials and shrubs, though the bed fully settles over one season.
Whichever route you take, cut the perimeter trench and install edging before planting — retrofitting it means digging around established plants. Improve the exposed soil with 5 cm of compost forked in, plant, then mulch 5–7 cm deep, keeping mulch clear of stems. The mulch suppresses wind-blown weed seed, which edging cannot stop.
What wears out first — and the mistakes that cause it
- Plastic coil: the exposed lip goes brittle from UV in 4–6 years and stake tabs snap. Keeping the top only 1–2 cm proud limits sun damage.
- Timber: rots at the soil line first, typically year three to five for untreated softwood. A gravel layer under the wood doubles its life.
- Painted steel: rusts at the soil line where moisture sits permanently. Corten avoids this by design — the surface rust is the protection.
- Brickwork: hairline frost cracks in mortar joints. Re-point every few years before water gets in and widens them.
- The number-one failure across all materials is a trench dug too shallow, followed by stakes spaced too far apart, which produces the wavy, leaning line that makes cheap edging look cheap.
On cost-per-year, the maths favours spending more once: a 12 m run of plastic at £2.50/m costs £30 but lasts about seven years (£4.30/year), while Corten steel at £9/m costs £108 and runs 20-plus years (£5.40/year) — near-identical money for zero re-installation labour.
FAQ
Does edging stop weeds completely?
No. It blocks roots and rhizomes spreading sideways from the lawn — the most persistent invader — but wind-blown and bird-dropped seeds still land in beds. Mulch handles those; the two work together.
How high should edging stick up?
One to two centimetres above finished soil level. Higher creates a trip hazard and a mower obstacle; flush gives you a clean mowing edge but less mulch retention.
Can I install edging without digging a trench?
Only hammer-in steel spike edging genuinely works this way, and only in reasonably soft, stone-free soil. Everything else needs a trench to reach effective depth — a product pushed 5 cm into the ground is fencing, not root barrier.