Key takeaways
- Do not exceed the transformer’s rated wattage. Add fixture wattages instead of estimating by fixture count.
- Do not mix 12V and 24V fixtures, bulbs, or transformers unless the equipment is specifically designed for both voltages.
- Do not bury a damaged cable. Cut out the damaged section and install a listed, waterproof low-voltage splice.
- Do not rely on a timer to diagnose a power problem. Use manual-on mode first.
- Do not aim bright spotlights directly at neighboring windows. A 7-watt LED spotlight can still create distracting glare when poorly positioned.
- Do not seal a wet fixture and turn it back on. Dry or replace it, and identify how water entered.
- Do not connect new fixtures before confirming their connector type and total load.
Landscape lighting can fail for simple reasons: a loose connector, a tripped transformer, water in a socket, or too much wattage on one circuit. Troubleshooting in the wrong order can make the problem harder to find, damage low-voltage components, or leave cable connections exposed to moisture. The safest approach is to start at the power source, test one section at a time, and avoid replacing parts until you know what failed.
This guide explains how to troubleshoot landscape lighting, including common 12V and 24V systems, path lights, spotlights, photocells, timers, and dusk-to-dawn controls. Most checks take only a few minutes and require basic hand tools rather than electrical experience.
Our top picks
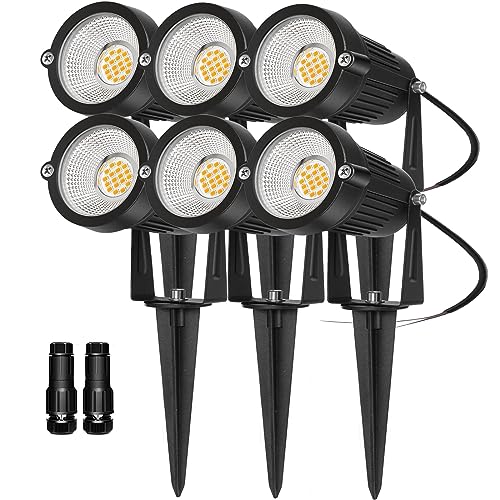 REEGOLD Low Voltage Landscape Lights Outdoor: 7W
- 12V 24V Low Voltage Landscape Lights: Low voltage…
- High Performance & Long Service Life: We used…
- IP65 Waterproof Rating: This pathway light has excellent…
 SUNVIE All-in-One LED Low Voltage Landscape Lighting
- 【Complete Landscape Lighting Kit】Includes 1 × 60W light-sensing…
- 【Standard Outdoor Lighting Kit】This kit is equipped with…
- 【Flexible Lighting Layout】Unlike other kits with fixed length…
As an Amazon Associate we earn from qualifying purchases at no extra cost to you.
What You Need
| Item | Why | Optional? |
|---|---|---|
| Noncontact voltage tester | Checks whether a household outlet is receiving power without opening the transformer. | No |
| Digital multimeter | Measures low-voltage output and helps identify a broken cable or poor connection. | No for detailed testing |
| Screwdriver and small pliers | Tighten terminals, remove covers, and reposition connectors. | No |
| Replacement waterproof connectors | Useful when a piercing connector is corroded, loose, or filled with water. | Yes |
| Electrical contact cleaner and a dry cloth | Removes light oxidation from accessible metal contacts. | Yes |
| Replacement LED bulb or fixture | Confirms whether a single dark fixture has failed. | Yes |
| 12-gauge or 14-gauge low-voltage cable | Replaces damaged cable or reduces voltage drop on longer runs. | Yes |
If you are replacing fixtures, a six-pack of 7-watt, 700-lumen LED spotlights such as the REEGOLD low-voltage landscape lights may cost about $35.99. A 12-piece all-in-one LED kit such as the SUNVIE dusk-to-dawn system may cost about $139.99. Confirm the kit’s voltage, connector style, transformer capacity, and included cable before mixing it with an existing system.
Step-by-Step
-
Identify the failure pattern (5 to 10 minutes)
Turn the system on manually, if the transformer has a manual or “on” setting. Observe whether every light is off, one section is dark, or only one fixture is affected.
The pattern provides a useful starting point. If all fixtures are dark, suspect the outlet, breaker, timer, transformer, photocell, or main cable. If lights after a particular point are dark, inspect the connection at that point. If only one light is out, check that fixture, bulb, socket, and nearby connector first.
-
Check the outlet and circuit breaker (5 minutes)
Make sure the transformer is plugged into a working, weather-protected GFCI outlet. Test the outlet with a lamp or outlet tester. If it is dead, press the GFCI reset button and check the related breaker in the electrical panel.
Do not repeatedly reset a breaker or GFCI that trips immediately. Unplug the landscape transformer and reset the device once. If it trips again, moisture, a damaged cord, or an electrical fault may be present.
-
Inspect the transformer settings (5 to 10 minutes)
Confirm that the transformer is set to the correct mode: manual “on,” timer, photocell, or dusk-to-dawn. Cover a photocell completely with your hand for up to two minutes to imitate darkness, or temporarily switch to manual mode.
Check the transformer’s output voltage rating. A 12V fixture should not be connected to an incompatible output. Also check the wattage load. Add the wattage of every fixture and keep the total comfortably below the transformer’s rated capacity; using roughly 80 percent or less leaves room for startup variation and future additions. For example, a 100-watt transformer should generally serve no more than about 80 watts of connected lighting.
-
Look for visible damage and water intrusion (10 to 15 minutes)
Walk the entire cable route. Look for cuts from edging tools, crushed cable beneath rocks, pulled connectors, exposed copper, melted insulation, and low spots where water can collect. Inspect fixtures for cracked lenses, loose stakes, corroded sockets, and water inside the housing.
Turn the system off before handling connections. Do not use household indoor wire nuts outdoors unless they are specifically rated for wet locations. Replace a connector that is cracked, badly corroded, or unable to seal around the cable.
-
Test one dark fixture (5 to 10 minutes)
Remove the bulb, if the fixture uses a replaceable lamp, and install a known-good replacement with the same voltage and compatible base. For an integrated LED fixture, temporarily connect a working fixture to the same connector.
If the replacement works, the original bulb or fixture has failed. If it remains dark, clean and reseat the connector. A loose piercing connector may not have fully contacted the cable. Reposition it only according to the manufacturer’s instructions; otherwise, replace it with a sealed connector.
-
Measure transformer output (5 minutes)
Set a digital multimeter to AC voltage, using a range above the system’s rated voltage. With the transformer energized, test the low-voltage output terminals without touching the probes together. The reading should be reasonably close to the transformer’s stated output, although some systems produce slightly more voltage under a light load.
If there is no output in manual-on mode but the outlet works, the transformer, fuse, internal switch, or control may have failed. Unplug the unit before checking an accessible fuse, and replace it only with the exact type and rating specified by the manufacturer.
-
Check for voltage drop along the run (10 to 20 minutes)
Long cable runs, undersized wire, excessive wattage, and many connectors can cause lights at the far end to appear dim or flicker. With the system on, measure voltage at the transformer and then at the last working fixture or the first dark fixture.
A substantial difference indicates voltage drop or a high-resistance connection. Reduce the load, divide fixtures between separate runs, shorten the run, or use a larger cable. As a general guide, 12-gauge cable is better suited to longer or higher-load runs than 14-gauge cable, while 16-gauge cable is best reserved for shorter, lighter installations.
-
Repair, retest, and protect the cable (15 to 30 minutes)
Replace failed fixtures or connectors, then retest the system in manual mode before restoring the timer. Bury exposed low-voltage cable at least 6 inches deep where practical, and place it deeper under areas likely to be disturbed by digging or aeration. Keep connections elevated or positioned in a drainage-friendly location rather than in a constant puddle.
Restore the dusk-to-dawn or timer setting and verify operation on the next evening. Aim fixtures away from windows and walkways, and make sure stakes do not puncture the cable.
Mistakes to Avoid
- Do not exceed the transformer’s rated wattage. Add fixture wattages instead of estimating by fixture count.
- Do not mix 12V and 24V fixtures, bulbs, or transformers unless the equipment is specifically designed for both voltages.
- Do not bury a damaged cable. Cut out the damaged section and install a listed, waterproof low-voltage splice.
- Do not rely on a timer to diagnose a power problem. Use manual-on mode first.
- Do not aim bright spotlights directly at neighboring windows. A 7-watt LED spotlight can still create distracting glare when poorly positioned.
- Do not seal a wet fixture and turn it back on. Dry or replace it, and identify how water entered.
- Do not connect new fixtures before confirming their connector type and total load.
How Often
Inspect landscape lighting at the beginning and end of each season, and after severe storms, flooding, landscaping work, or construction. Check fixtures for leaning, clean dirt from lenses, and trim plants that block the beam. Test timers and photocells every few months. After a new installation, recheck connectors and cable placement after the first heavy rain and again after the ground settles.
When to Call a Pro or Replace
Call a licensed electrician if the household outlet, GFCI, breaker, or transformer wiring is hot, burned, repeatedly tripping, or difficult to access safely. Professional help is also appropriate when the system requires a new outdoor circuit, a hardwired transformer, or extensive buried-cable replacement.
Replace a fixture when its housing is cracked, the socket is severely corroded, water repeatedly returns, or an integrated LED module flickers after connections and voltage test normally. Replace a transformer when it has no output despite a working outlet and correct settings, or when its enclosure shows heat damage. Choose a replacement with the same voltage, an equal or greater capacity, outdoor-rated construction, and controls compatible with your system.
FAQ
Why are all my landscape lights suddenly off?
Start with the outlet, GFCI, breaker, transformer setting, and photocell. If the outlet works and the transformer has no low-voltage output in manual-on mode, the transformer or its fuse may have failed. If output is present, inspect the main cable and first connection.
Why are the lights at the end of the cable dim?
This is usually voltage drop caused by a long run, too much wattage, undersized cable, or a corroded connection. Measure voltage near the transformer and at the dim fixture, then reduce the load, split the run, improve the connection, or use larger-gauge cable.
Can I leave low-voltage landscape lights on all night?
Yes, if the fixtures, transformer, cable, and controls are outdoor-rated and the total load stays within the transformer’s capacity. A timer or dusk-to-dawn control can reduce operating time and energy use. Keep the transformer ventilated and protected from direct standing water.
How do I know whether to replace the bulb or the whole light?
Swap in a known-good bulb when the fixture has a replaceable lamp. If it still stays dark, test the connector and cable. Integrated LED fixtures generally require replacement when their LED module fails, because the light source is not designed to be changed separately.