Key takeaways
- A factory radio often delivers roughly 12–22 watts RMS per channel, despite larger marketing numbers.
- A compact aftermarket amplifier commonly supplies 45–75 watts RMS per channel.
- A stronger system may provide 75–125 watts RMS per channel to the front speakers.
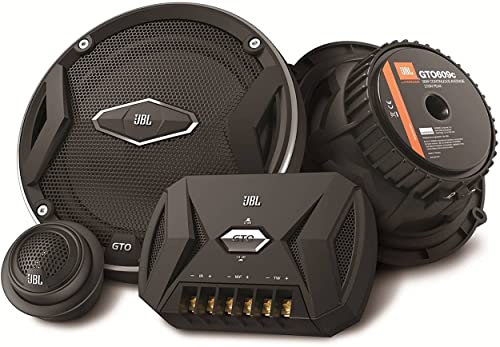
The best component speakers for car audio upgrades are the ones that fit your door depth, suit your head unit or amplifier’s RMS output, and offer enough sensitivity to play cleanly without demanding more power than your system can provide.
Our top picks


As an Amazon Associate we earn from qualifying purchases at no extra cost to you. Ratings are shown as listed on Amazon.
Quick picks by upgrade situation
| Situation | Best speaker type or example | Why it fits | Watch for |
|---|---|---|---|
| Factory head unit, no amplifier | High-sensitivity 6.5-inch component set, such as Hertz CK 165 | Output around 92–93 dB can produce useful volume from modest factory power | Very low-impedance speakers may overload an OEM radio |
| Compact aftermarket amplifier | JL Audio C2-650 or Alpine S2-S65C | Typically handles about 60–80 watts RMS and works well with common four-channel amps | Confirm the exact mounting depth behind the window glass |
| Warm, detailed daily-driver sound | Morel Maximo Ultra 602 MKII | Generally smooth tweeter presentation and moderate power requirements | Its tweeter and woofer may need careful positioning for the best image |
| Powerful amplifier and strong midbass | Focal Performance or Flax Evo 6.5-inch component set | Higher-end construction and power handling can support a more ambitious system | Some models need more installation depth and a rigid adapter ring |
| Shallow door or unusual factory location | Shallow-mount 6.5-inch component set | Reduced basket depth helps avoid interference with the window mechanism | Shallow speakers may need sound-deadening treatment to recover midbass |
What to match before choosing
1. Nominal size is only the starting point
A “6.5-inch” speaker is usually intended for a 165 mm opening, but the basket’s outside diameter, screw-hole pattern, grille clearance, and mounting depth vary considerably. A factory 6.5-inch speaker may require a vehicle-specific adapter bracket, while some doors accept a 6.75-inch basket with a different adapter.
Measure from the mounting surface to the nearest obstruction, then subtract a safety margin of at least 3–5 mm. Check the clearance with the window fully lowered, because the glass can pass directly behind the speaker magnet. Also allow room for the grille and for the door panel to clip back into place.
For example, if the measured available depth is 62 mm, a speaker listed at 60 mm mounting depth is not automatically safe. The basket may sit closer to the glass at one point, and the adapter ring may add 3–6 mm. A speaker rated at 55 mm or less is the safer choice unless you can verify the installation geometry.
2. Match RMS power, not peak power
RMS handling is the useful comparison. Peak or “maximum” figures describe short bursts and are not a sensible basis for amplifier matching.
- A factory radio often delivers roughly 12–22 watts RMS per channel, despite larger marketing numbers.
- A compact aftermarket amplifier commonly supplies 45–75 watts RMS per channel.
- A stronger system may provide 75–125 watts RMS per channel to the front speakers.
A speaker rated for 60–100 watts RMS can still work from a factory head unit. It will simply not reach its full output potential. Conversely, a 40-watt RMS speaker can work with a 60-watt amplifier if gain is set correctly and the system is not driven into audible distortion. The goal is clean power and sensible gain adjustment, not identical numbers on every box.
As a practical target, choose a component set whose RMS rating is within about 25% of the amplifier’s continuous output. With a 75-watt-per-channel amplifier, a speaker rated around 60–100 watts RMS is a reasonable range.
3. Use sensitivity to judge head-unit compatibility
Sensitivity indicates how loudly a speaker plays from a given amount of power. A 93 dB speaker can usually play noticeably louder from an OEM radio than an 88 dB speaker with the same input.
The difference is substantial: every 3 dB of sensitivity improvement approximately halves the electrical power needed for the same output level. If one speaker is rated at 93 dB and another at 90 dB, the first may need about half as much power to produce a similar volume, although measurement methods and frequency ranges can differ between brands.
For a head-unit-only upgrade, prioritize sensitivity around 91 dB or higher. If you have a properly installed amplifier, sensitivity becomes less critical and you can give more weight to tonal balance, tweeter design, and midbass performance.
Component speaker comparison
| Example set | Woofer size | RMS handling | Sensitivity | Nominal impedance | Approx. mounting depth | Typical market range |
|---|---|---|---|---|---|---|
| JL Audio C2-650 | 6.5 in | 60 W | About 90.5 dB | 4 ohms | About 60 mm | $150–$220 |
| Alpine S2-S65C | 6.5 in | 80 W | About 88 dB | 4 ohms | About 60 mm | $180–$280 |
| Morel Maximo Ultra 602 MKII | 6.5 in | About 90 W | About 90 dB | 4 ohms | About 67 mm | $250–$350 |
| Hertz CK 165 | 6.5 in | About 95 W | About 93 dB | 4 ohms | About 67 mm | $220–$330 |
| Focal Performance 6.5-inch set | 6.5 in | Roughly 80–120 W, model dependent | About 91–93 dB, model dependent | 4 ohms | Roughly 70–75 mm, model dependent | $350–$700 |
Specifications can vary between revisions and regional versions, so use these figures as a shortlist rather than a substitute for the current manufacturer sheet. In particular, confirm depth and cutout dimensions before ordering.
Tweeter mounting can change the result
Component sets separate the tweeter from the woofer, allowing better placement than a coaxial speaker. The three common options are surface mounting, flush mounting, and angled or swivel mounting.
- Surface mount: easiest to install and useful when the factory sail-panel opening is too small. It usually places the tweeter farther into the cabin.
- Flush mount: looks closest to an original installation but requires cutting or adapting the panel.
- Angled mount: directs high frequencies toward the occupants and can improve stereo imaging, though excessive toe-in may make the treble sound sharp.
Mounting both tweeters at equal heights and aiming them toward the space between the front seats is a sensible starting point. If the system sounds bright, use the crossover’s tweeter attenuation setting before permanently changing the mounting angle.
Installation details that matter more than a small spec difference
- Use a solid adapter ring. A warped or thin plastic bracket can waste midbass energy and allow air leaks around the woofer.
- Seal the speaker to the door. Closed-cell foam gasket tape helps prevent front-wave and rear-wave cancellation around the mounting surface.
- Protect the rear of the speaker. A foam baffle or splash guard can reduce direct water exposure, but do not completely enclose the basket if it prevents ventilation.
- Apply sound-deadening selectively. Treating the metal immediately around the speaker and the large vibrating door skin often produces a larger improvement than adding more speaker power.
- Install the crossover securely. Keep it away from window tracks, moisture, and loose wiring. Use cable ties or screws rather than allowing it to rattle inside the door.
- Set polarity consistently. Connect every woofer and tweeter with the same positive and negative orientation unless the manufacturer specifically directs otherwise.
Common buying and ownership mistakes
The most frequent mistake is buying by peak wattage while ignoring sensitivity and depth. Another is installing a powerful woofer on a flimsy adapter, which can create rattles and weak bass. A door speaker is also exposed to humidity, dust, vibration, and occasional water entering through the window seal. Paper or untreated fabric cones may need more protection than polypropylene, treated fiber, or composite cones.
Over time, foam surrounds and adhesive joints are more likely to deteriorate than the metal basket. Keep drain holes open, replace damaged door moisture barriers, and investigate new buzzing sounds before increasing amplifier gain. Do not use household solvents or saturate the cone with cleaner; a dry, soft brush and a lightly damp cloth on the grille are safer.
Bottom line
For an unamplified factory system, choose a 4-ohm component set with sensitivity around 91 dB or higher and moderate RMS requirements. For a 50–100 watt-per-channel amplifier, prioritize a well-built 6.5-inch set rated in that power range, then verify the basket depth and tweeter location. The best component speakers for car audio upgrades are not necessarily the most powerful: they are the set that fits the door without interference, matches the available clean power, and can be mounted and sealed well enough to deliver the performance its specifications promise.